Easy Homemade Cheese, Herb & Garlic Quick Bread
Easy Homemade Cheese, Herb & Garlic Quick Bread
Creating a delicious homemade quick bread recipe is easier than you think, especially with a flavorful twist like cheese, herbs, and garlic. This easy bread recipe is perfect for accompanying your favorite soups or stews, or simply enjoying as a snack on its own.
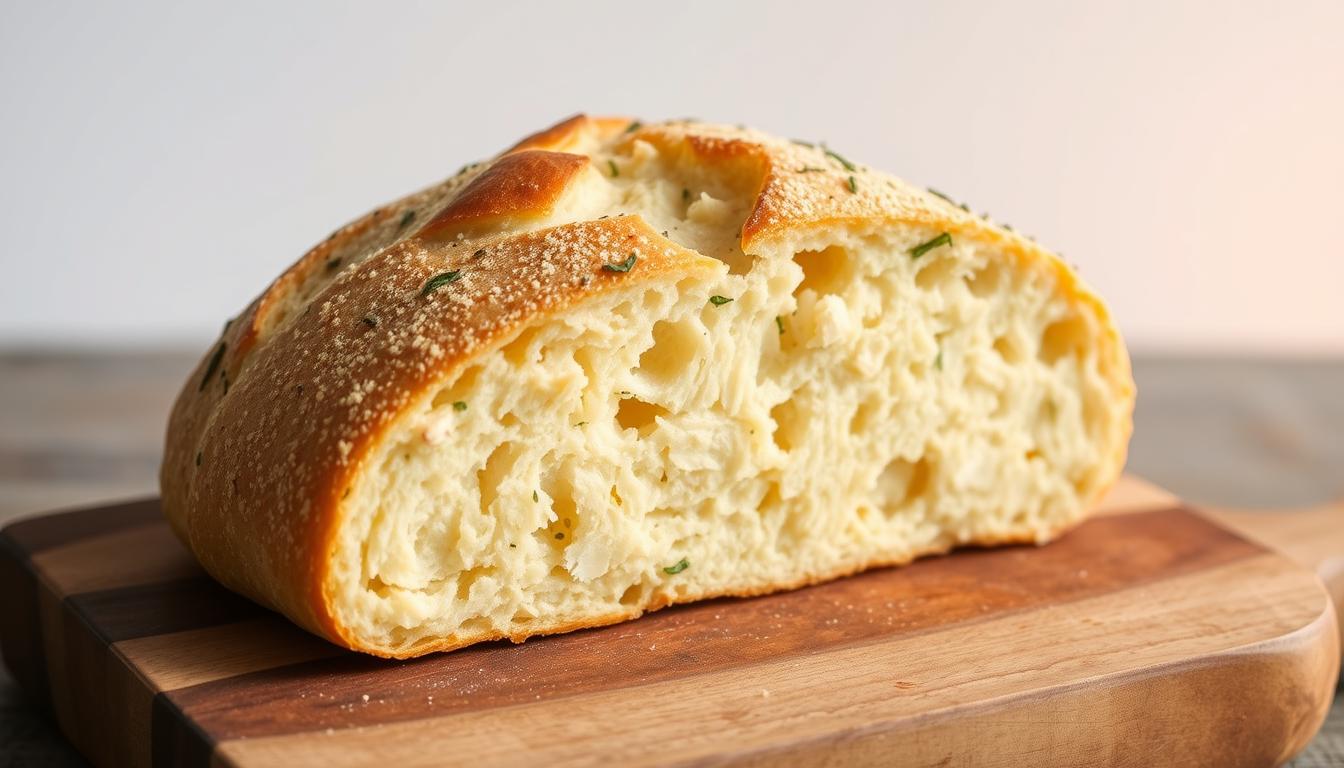
The beauty of this cheese bread lies in its simplicity and the minimal ingredients required. With a straightforward process, you can have a freshly baked loaf ready in no time. Our guide will walk you through preparing the ingredients and baking the perfect loaf.
Key Takeaways
- Simple ingredients for an easy bread recipe
- Perfect for accompanying meals or as a snack
- Minimal preparation time for a freshly baked loaf
- Delicious homemade quick bread recipe with a flavorful twist
- Straightforward baking process
The Magic of Homemade Quick Breads
There's something magical about creating delicious breads without the wait. Homemade quick breads have become a staple for many home bakers due to their simplicity and versatility.
No Yeast, No Wait: The Quick Bread Advantage
The primary advantage of quick breads lies in their ability to be prepared and baked quickly, bypassing the need for yeast. This makes them ideal for last-minute gatherings or when craving freshly baked bread. With a quick bread recipe, you can have a delicious loaf ready in under an hour.
The Perfect Flavor Trio: Cheese, Herbs, and Garlic
The combination of cheese, herbs, and garlic in a quick bread recipe creates a truly irresistible flavor profile. The richness of cheese pairs perfectly with the aromatic freshness of herbs and the pungency of garlic, making a cheese and herb bread or garlic bread recipe a hit with family and friends. "The perfect blend of flavors elevates the humble quick bread to a new level," as many bakers would agree.
Essential Ingredients for Perfect Cheese, Herb & Garlic Quick Bread
To make a mouth-watering cheese, herb, and garlic quick bread, it's crucial to start with the right ingredients. The quality and combination of these ingredients will directly impact the flavor, texture, and overall success of your quick bread.
Flour and Leavening Agents
The foundation of any bread is flour. For quick bread, all-purpose flour is typically used. Leavening agents like baking powder and baking soda are crucial for the bread to rise properly. Ensure your leavening agents are fresh for the best results.
Best Cheeses for Baking
When it comes to baking cheese, a combination of cheddar and parmesan works well. Cheddar adds a rich, tangy flavor, while parmesan provides a salty, nutty taste. Experiment with different ratios to find your perfect blend.
Fresh vs. Dried Herbs: Making the Right Choice
The choice between fresh vs. dried herbs depends on the desired intensity of flavor. Fresh herbs provide a brighter, more delicate taste, while dried herbs offer a more concentrated flavor. For quick bread, dried herbs are often preferred for their consistency.
Garlic Preparation Techniques
Garlic preparation can significantly impact the flavor of your quick bread. Mince garlic finely to release its oils and flavor compounds. You can also roast garlic for a deeper, nuttier flavor.
Equipment and Preparation Setup
To ensure a smooth baking process, gather your necessary equipment and set up your workspace efficiently. Having the right tools at hand makes a significant difference in the quality of your cheese, herb, and garlic quick bread.
Loaf Pans and Alternative Baking Vessels
Choosing the right loaf pan or baking vessel is crucial. Traditional loaf pans are ideal, but you can also use alternative vessels like ceramic or cast-iron pots. The key is to ensure the vessel is greased properly to prevent sticking.
| Baking Vessel | Material | Non-Stick Properties |
|---|---|---|
| Traditional Loaf Pan | Metal | Yes, when greased |
| Ceramic Pot | Ceramic | Yes, with proper seasoning |
| Cast-Iron Pot | Cast Iron | Yes, when seasoned |
Essential Mixing Tools and Workspace Organization
For mixing, you'll need a large bowl, a whisk, and a spatula. Keeping your workspace organized by grouping dry and wet ingredients separately can streamline the mixing process.
By having the right equipment and a well-organized workspace, you'll be well on your way to baking a delicious cheese, herb, and garlic quick bread.
Step-by-Step Mixing Method
Achieving the right consistency in quick bread requires a precise mixing method. This involves several key steps that ensure your cheese, herb, and garlic quick bread turns out light and flavorful.
Measuring and Preparing Your Ingredients
Before you begin mixing, it's crucial to measure your ingredients accurately. Use a digital scale for precision, especially for ingredients like flour and cheese. Ensure that your herbs are fresh and your garlic is minced to the right consistency.
Tip: Cold ingredients can affect the mixing process. Take your butter and eggs out of the refrigerator ahead of time to let them reach room temperature.
Combining Dry Ingredients Properly
In a large bowl, combine your dry ingredients, including flour, baking powder, salt, and any dried herbs you're using. Whisk these ingredients together until they're evenly distributed. This step helps to prevent any dense or uneven areas in your quick bread.
| Dry Ingredient | Quantity |
|---|---|
| Flour | 2 cups |
| Baking Powder | 1 teaspoon |
| Salt | 1/2 teaspoon |
Incorporating Wet Ingredients Without Overmixing
Make a well in the center of your dry ingredients and add the wet ingredients, including beaten eggs, melted butter, and minced garlic. Mix these ingredients together gently until just combined. Overmixing can lead to a dense quick bread, so stop mixing as soon as the ingredients are cohesive.

Baking Techniques for Cheese, Herb & Garlic Quick Bread
To ensure your cheese, herb, and garlic quick bread turns out perfectly, it's essential to understand the baking process. Baking is not just about placing the bread in the oven; it's about creating the right conditions for it to rise and develop flavor.
Optimal Oven Temperature and Rack Positioning
Preheating your oven to the correct temperature is crucial. For most quick breads, a temperature of 350°F (175°C) is ideal. However, it's essential to consult your oven's manual, as temperature accuracy can vary. Positioning the rack in the center of the oven ensures even heat distribution around the bread. Proper oven temperature and rack positioning are key to a perfectly baked loaf.
Visual and Tactile Cues for Perfect Doneness
Determining when your quick bread is done involves both visual and tactile checks. A perfectly baked loaf should be golden brown on top and sound hollow when tapped on the bottom. You can also insert a toothpick into the center; if it comes out clean or with a few moist crumbs, the bread is ready. These cues are crucial for avoiding under or overbaking.
Proper Cooling Methods for Best Texture
After baking, it's tempting to slice into the bread immediately. However, cooling it properly is vital for achieving the best texture. Let the bread cool in the pan for 10 minutes before transferring it to a wire rack to cool completely. This process helps the bread set and makes it easier to slice. Proper cooling enhances the overall texture and flavor of your quick bread.
Troubleshooting Common Quick Bread Problems
Baking quick bread can sometimes be a trial-and-error process, but with a few troubleshooting tips, you can achieve perfect results every time. Despite careful measurements and following recipes, issues like dense texture, uneven baking, and imbalanced flavors can still occur.

Fixing Dense or Heavy Texture
A dense or heavy texture in quick bread often results from overmixing the batter or using old leavening agents. To avoid this, mix wet and dry ingredients separately and gently fold them together until just combined. Ensure your baking powder and baking soda are fresh to help your bread rise properly.
Addressing Uneven Baking Issues
Uneven baking can be caused by an incorrect oven temperature or improper rack positioning. To correct this, use an oven thermometer to verify your oven's temperature accuracy. Additionally, position your bread in the center of the oven on a middle rack to promote even heat distribution.
Balancing Flavors When Something's Off
If your quick bread tastes too salty, sweet, or garlicky, it might be due to ingredient imbalance. To balance flavors, you can adjust the quantities of ingredients in your next batch or add complementary flavors. For instance, a pinch of sugar can counterbalance excessive saltiness.
Creative Variations and Serving Suggestions
Discover the versatility of cheese, herb, and garlic quick bread through innovative flavor adaptations and serving ideas. This beloved bread can be transformed to suit various cuisines and meals, making it a staple in your kitchen.
Mediterranean and International Flavor Adaptations
To give your quick bread a Mediterranean twist, try adding Kalamata olives and artichoke hearts. For an Italian flair, incorporate sun-dried tomatoes and fresh basil. If you prefer something spicier, add some diced jalapeños or red pepper flakes.
- Add feta cheese and kalamata olives for a Greek-inspired flavor.
- Mix in some chopped cilantro and green chilies for a Mexican twist.
Pairing Suggestions for Soups, Stews, and Meals
This quick bread pairs perfectly with a variety of soups and stews. Serve it alongside a warm bowl of tomato soup or a hearty beef stew. It's also great as a side to your favorite salads or as a base for sandwiches.
| Meal | Pairing Suggestion |
|---|---|
| Tomato Soup | Serve with a swirl of cream and a sprinkle of basil. |
| Beef Stew | Enjoy with a pat of butter and a side of roasted vegetables. |
Storage and Reheating Tips
To keep your quick bread fresh, store it in an airtight container at room temperature for up to three days. For longer storage, wrap it tightly and freeze. To reheat, simply slice and toast or warm in the oven at 350°F (175°C) for a few minutes.
Conclusion
Creating a mouth-watering Cheese, Herb & Garlic Quick Bread at home is now within your reach. This quick bread recipe summary highlights the simplicity and flexibility of the recipe, allowing you to experiment with various flavors and ingredients.
By following the steps outlined in this article, you can produce a deliciously aromatic bread perfect for accompanying soups, stews, or enjoyed on its own. The conclusion of this guide encourages you to explore different variations, such as Mediterranean or international flavor adaptations, to keep your baking exciting and tailored to your taste preferences.
With the knowledge gained, you're ready to start baking and enjoying the fruits of your labor. Happy baking!
FAQ
What type of cheese is best for Cheese, Herb & Garlic Quick Bread?
Cheddar, Parmesan, or a combination of cheeses works well for this recipe, as they provide a rich, tangy flavor. You can also experiment with other hard cheeses like Gruyère or Gouda.
Can I use dried herbs instead of fresh ones?
Yes, you can use dried herbs as a substitute for fresh herbs. However, keep in mind that dried herbs are more potent, so use about one-third the amount called for in the recipe.
How do I prevent overmixing the dough?
To prevent overmixing, gently fold the wet and dry ingredients together until just combined. Stop mixing as soon as the ingredients come together in a shaggy dough, and avoid over-stirring or using an electric mixer.
What if my quick bread turns out dense or heavy?
A dense or heavy texture can be caused by overmixing, incorrect oven temperature, or using old baking powder. Try adjusting your mixing technique, checking your oven temperature, and using fresh baking powder.
Can I freeze Cheese, Herb & Garlic Quick Bread?
Yes, you can freeze the bread for up to 3 months. Wrap it tightly in plastic wrap or aluminum foil and store it in a freezer-safe bag. Thaw at room temperature or reheat in the oven or microwave.
How do I store leftover quick bread?
Store leftover quick bread in an airtight container at room temperature for up to 3 days or wrap it tightly and freeze for longer storage.
Can I make this recipe in a slow cooker or Instant Pot?
While the recipe is designed for conventional oven baking, you can experiment with adapting it for a slow cooker or Instant Pot. Adjust cooking times and temperatures according to the device's guidelines.


0 Comments